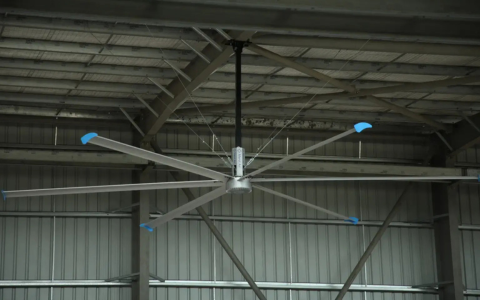
An HVLS fan, or high-volume low-speed fan, having bigger blades, increases airflow and saves on energy while providing more comfort for large indoor space areas. But its installation is not as simple as the normal fan’s; it requires professional and careful stepwise installation to make sure that the fan works perfectly and safely. So, if you are thinking of installing an HVLS fan, then be aware of the below-given key steps to make the whole process effortless and get the most out of your investment.
Important HVLS Fan Installation Steps
Step 1: Do Planning Before Installation
You have to prepare these points carefully before proceeding with the installation:
- Choose the proper location for installation that maximizes the airflow, and remember to not keep it very close to the wall, light, or any other substances.
- Do not install the fan below 15 feet in height.
- Ensure that an appropriate amount of power supply reaches the HVLS fans.
Step 2: Getting Everything that Is Essentially Required
To commence the installation, ensure that you are ready with everything so that any problems do not occur later during the installation. Gather the following things:
- Full HVLS fan kit (including blades, motor, and other hardware)
- Safety cables
- Ladders for high-ceiling access
- Voltage tester
- Wrenches, screwdrivers, pliers, and other electrical tools
Step 3: Mounting the HVLS Fan
The safety and performance of any HVLS fan depend on its proper installation. So, follow these steps carefully:
- Attach the motor and mounting bracket to the ceiling structure in a way that it can strongly bear the weight of the HVLS fan. Keep the mounting bracket perfectly leveled
- to avoid any shaking.
- Double-check the support in the ceiling to see whether it can bear the actual heaviness of the fan or not.
- Provide suitable anchors and bolts according to the type of the ceiling material.
- Use safety cables to prevent the fan from falling when in operation.
Step 4: Install the Fan Blades
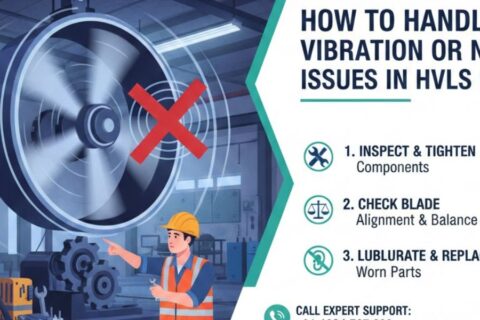
When the motor and bracket are properly attached to the place, the next step is to install fan blades. Attach every blade evenly and properly to the motor hub. Check that the blades are aligned and balanced perfectly to avoid any type of vibration or noise.
Step 5: Do Wiring of the Fan
Now, it is the time to connect other electrical components. If the fan’s wiring diagram is available, then with its help correctly connect the motor to the power source. Insulate all wires properly to avoid the situation of short circuits. Use a voltage tester and verify the electrical connections before turning on the fan.
Step 6: Test the HVLS Fan
The final and important part is to test the working capability of the fan. Turn on the fan and observe its operation to find whether any unusual sounds or vibrations are happening or not. Verify that airflow is distributed evenly and all bolts, nuts, & safety cables are secure.
Conclusion
Installing an HVLS fan is not the same as normal fan installation. Good planning and attention to every minute detail are required. By following these steps, you can surely do the safe installation and secure the efficient working of the HVLS fan. This also aids in improving airflow and energy savings. So, choose the right HVLS fan from Marut Air and enjoy its full benefits with an impactful installation.
Frequently Asked Questions about How to Install HVLS Fans
Question 1. What would Marut Air’s support team do at the initial stage for the installation of HVLS fans?
Answer: Before the installation of HVLS fans, Marut Air’s support team will check the height and strength of the ceiling for proper installation. Also, they examine the power supply or wiring so that it does not create a problem further for their installation. Our support team also ensures that the fan does not block any light, airflow, or walls.
Question 2. Are any equipment or tools required for the installation?
Answer: Yes, installing HVLS fans requires some tools so that they can attach to the ceiling properly. During installation, the support team of Marut Air keeps their fan kit that contains safety cables, wrenches, a screwdriver, pliers, and a voltage tester. This equipment or these tools are necessary to maintain the safety of our team and also for the area where it is installed.
Question 3. Is there any way to avoid vibration while installing the mounting bracket and motor?
Answer: Yes, there is a way to avoid such vibration while installing the mounting bracket and motor. All you need to keep a few things in mind is to fix the bracket to the strong ceiling beam firmly at the right level. While installing the motor, keep it straight and attach it securely using a safety cable. If they are properly aligned, then it reduces the chance of vibration and allows the fan to operate for a long time.
Question 4. What is the right way to fix the fan blades properly so that they can maintain a balance?
Answer: While installing, fix the blades at an equal distance from the hub, and also check the alignment carefully. Check if the blades are properly installed; otherwise, they will wobble. If the blades are installed the right way, then they ensure smooth airflow and enhance the lifespan of the motor too.
Question 5. What are the effective ways to check if the fan is properly installed?
Answer: After installation, start the fan at a lower speed and then gradually increase its speed, and also observe its airflow. If there is any kind of unusual noise coming from the fan while operating, then immediately stop the fan and check the adjustments. Make sure all the nuts, bolts, and safety cables are properly fixed; this will ensure a smooth and safe operation.
Question 6. Does Marut Air provide installation support or guidance?
Answer: Yes, Marut Air provides a detailed installation guide before installation. It helps you to get more information about HVLS fans and how to keep them properly so that they can operate for a long duration. Our expert team is highly skilled and professional, which helps you with site evaluation and offers troubleshooting support after the installation if required.


